Change how a checklist is grouped
Every item on a checklist sits under a Group, and can sit under a Sub-group inside it. The group is the heading your customer sees on their report, like Indoor Unit or Outdoor Unit. Sub-groups, like Filter & Coil, only organize your tech's screen. They don't appear on the report.
- Open Checklists and tap the checklist you want to change.
- To move an item, choose a different heading from its Group or Sub-group list.
- To start a new heading, choose + New group… (or + New sub-group…) from the list, type the name, and tap away. If you change your mind, leave the box empty and tap away, and the item stays where it was.
- To rename a heading, tap it where it sits above its items and type the new name. Every item under it moves with it.
- To reorder, use the up and down arrows on an item. They move it within its sub-group.
- To add an item in a particular spot, tap Add to … at the end of that section.
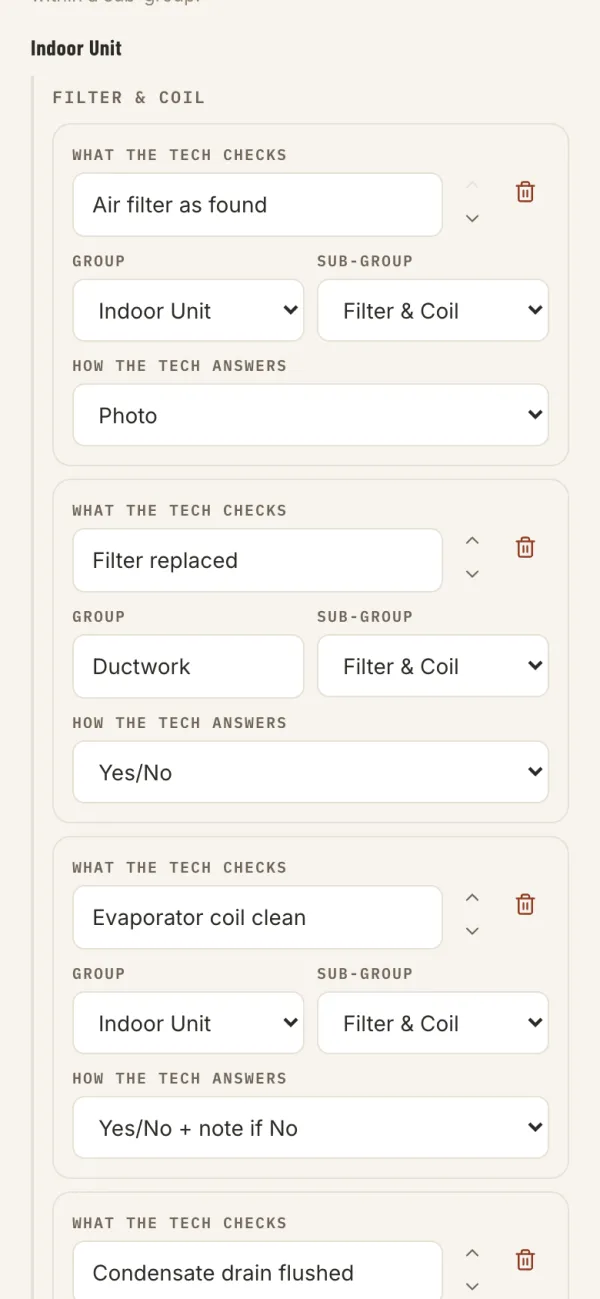
a+ New group… lets you type a heading that doesn't exist yet.
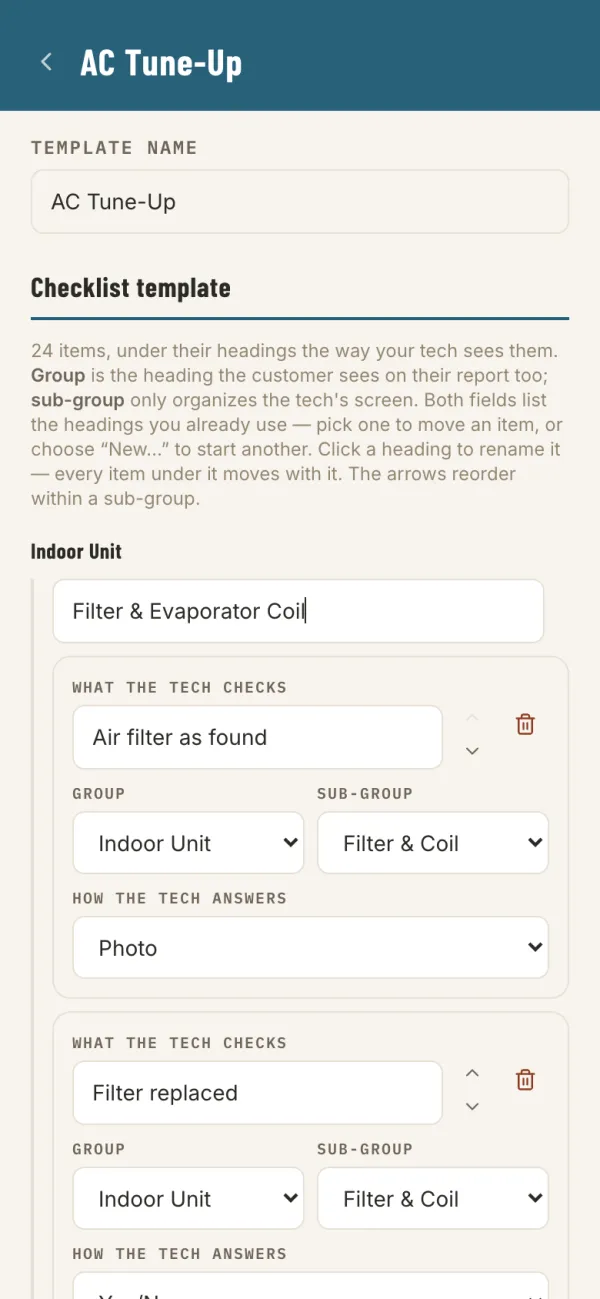
bTap a heading to rename it. The items under it follow.
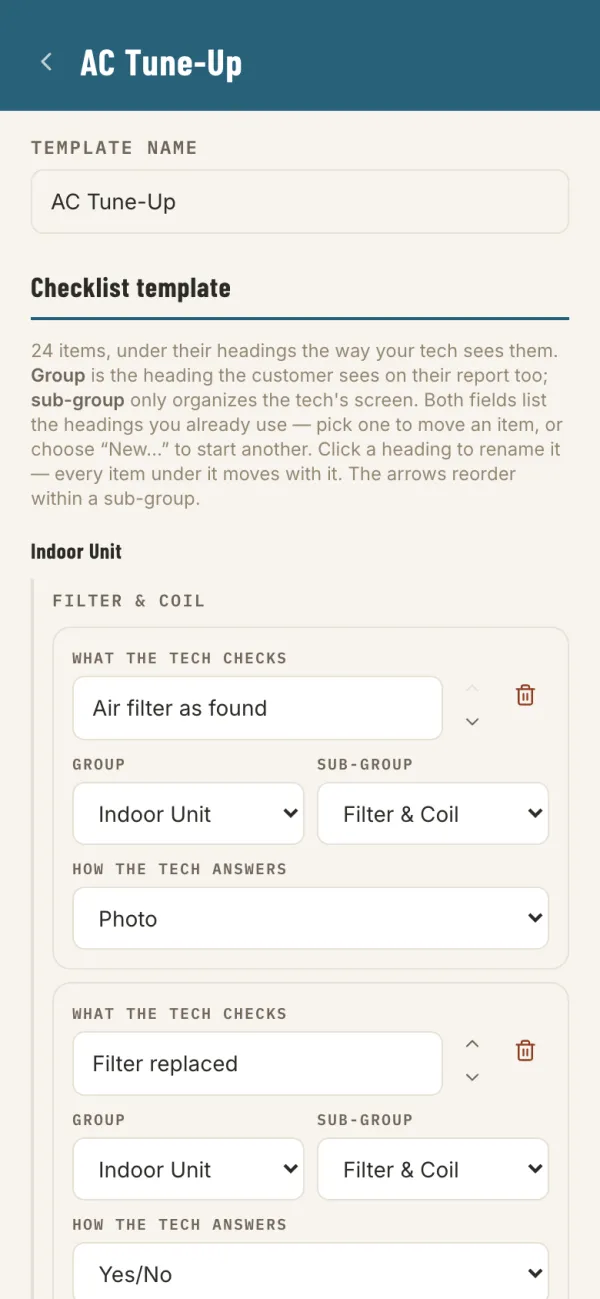
cItems sit under their headings the way your tech sees them.
Changes save as you go. New visits use the checklist as it is now, and reports you've already sent keep the version they were done with.
Choose how an item is answered
On each item, How the tech answers decides what your tech does on site, and what the customer reads on the report.
- Yes/No: a quick check.
- Yes/No + note if No: a No can't be left without a reason, so the customer always learns what was wrong.
- Written note: the tech types what they found.
- Photo: the report can't be submitted until there's at least one photo.
- Reading: a number with a Unit, and an optional Target min and Target max. A reading outside the target turns red and asks the tech why.
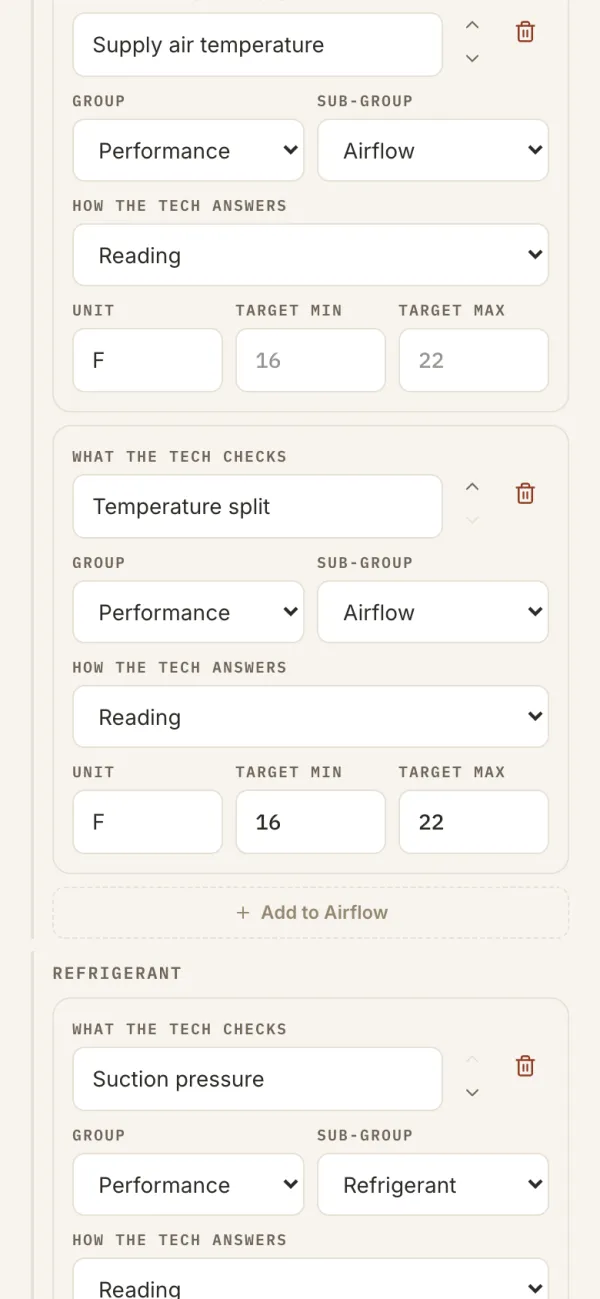
aA Reading with a target range of 16 to 22°F.
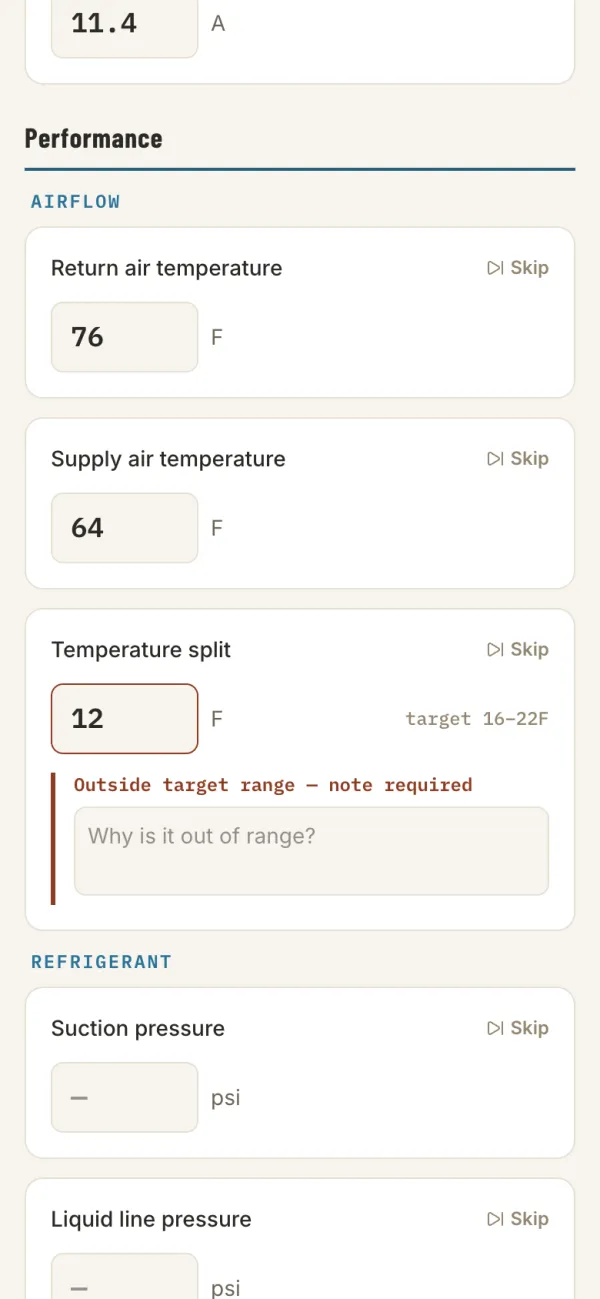
bOn site, a reading outside the target turns red and asks why.
Add a customer
- Open Customers and tap Add a customer.
- Type the customer's name: a person, or a business like Desert Lantern Dental.
- Type the address, then tap Confirm on map to put the pin on the right house. When your phone's location is on, the app then shows how far you are from each customer and offers to start the report when you arrive.
- Add any Gate code, Garage code and Special instructions. Codes stay hidden on the customer's page until someone taps Reveal.
- Under Contacts, tap Add contact and enter who gets the report email. Give each one a name: emails say hello to them by first name, so a business's office manager gets "Hi Dana". Leave Email this person when a report is submitted ticked for anyone who should get it.
- Tap Create customer.
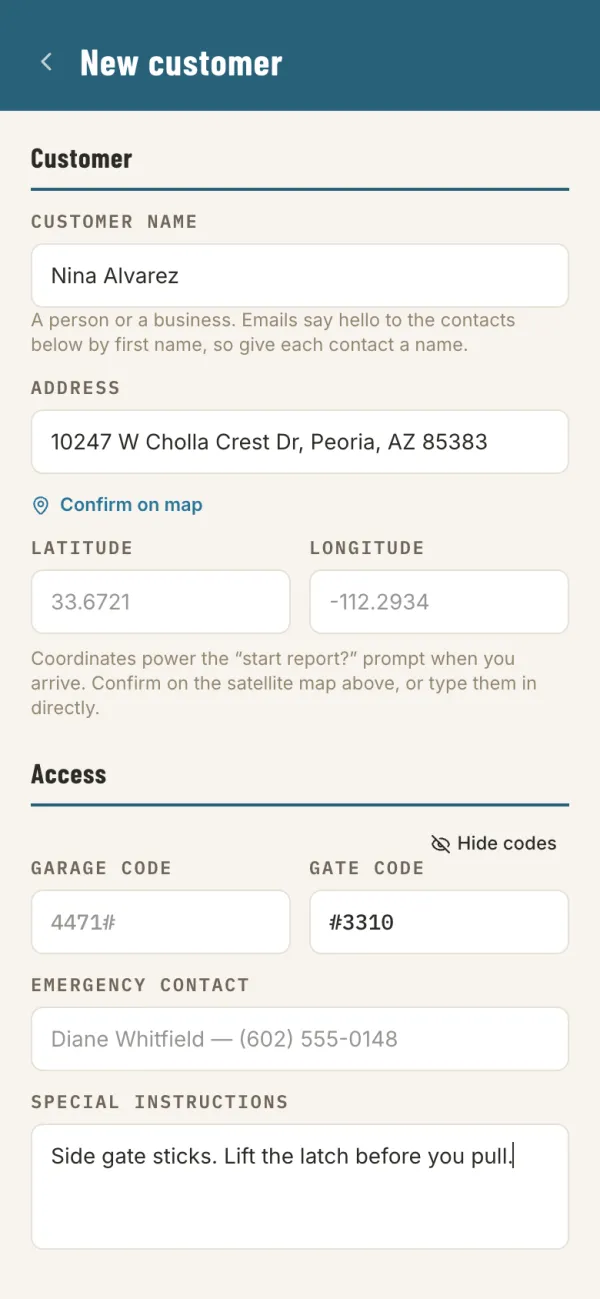
aName, address, codes and instructions.
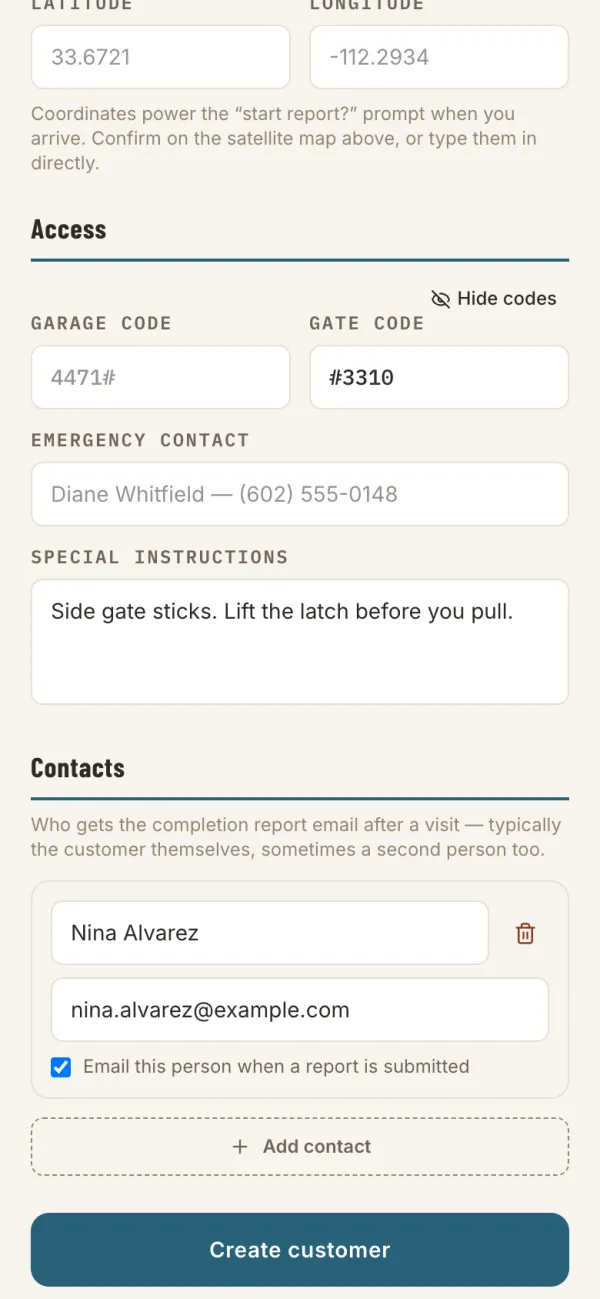
bContacts are who the report email goes to.
Send a report again
Open the report, from Reports or from the customer's Recent reports. The Completion email card shows when it went out and whether it was Delivered, Opened or Bounced.
- Tap Resend to send it to the customer's contacts again.
- If it Bounced, the email address is wrong. Fix it on the customer with Edit customer details, then tap Resend.
You can also copy a link to the report with the link button at the top of the report, and text it to the customer yourself.
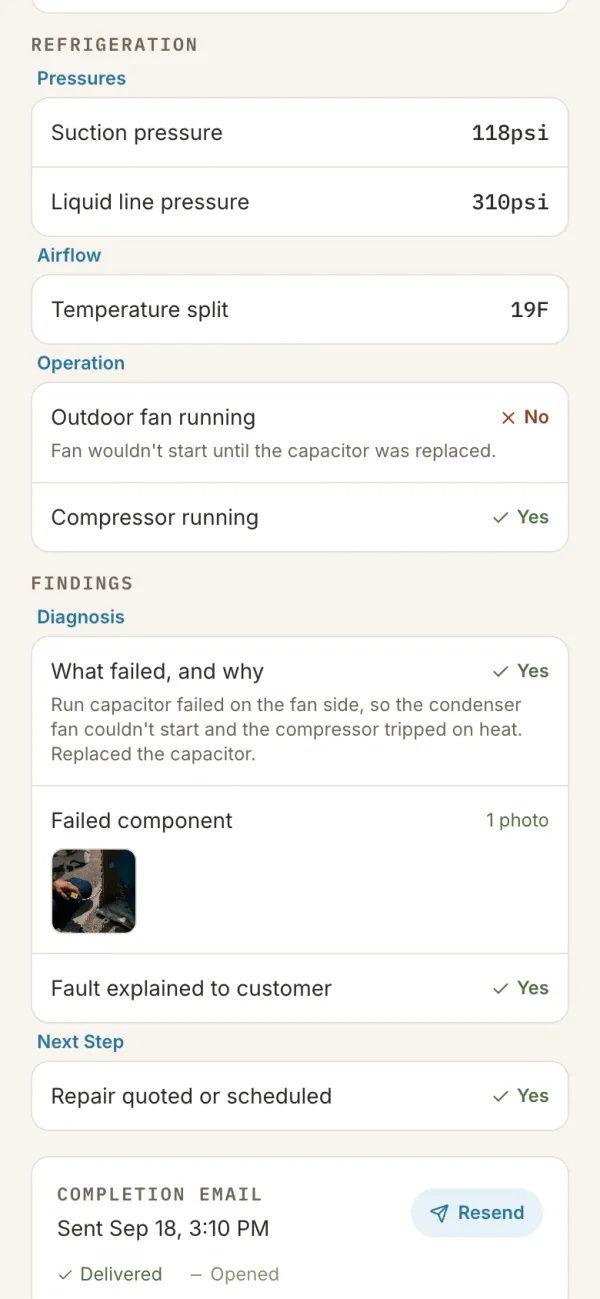
aCompletion email: when it was sent, and whether it arrived.
Create and send an invoice
If you build invoices, you bill from the Invoices tab. One invoice can cover a single job, or several for the same customer, like a repair and its follow-up visit.
- Open Invoices and tap New invoice.
- Choose the customer. Their Unbilled reports appear: submitted reports with a price that aren't on an invoice yet. Tick each one you want on this bill.
- Under Charges and discounts, tap Add a line for anything that belongs to the bill rather than one job, like a trip charge or a permit. Tap +$ to turn a line into a discount.
- Add Notes on this invoice for anything the customer should read with the bill. Ways to pay starts with the payment instructions from Settings; change it here for this bill only.
- Tap Issue invoice and email it. The invoice gets the next number, and the customer gets one email with each job linked to its photo report.
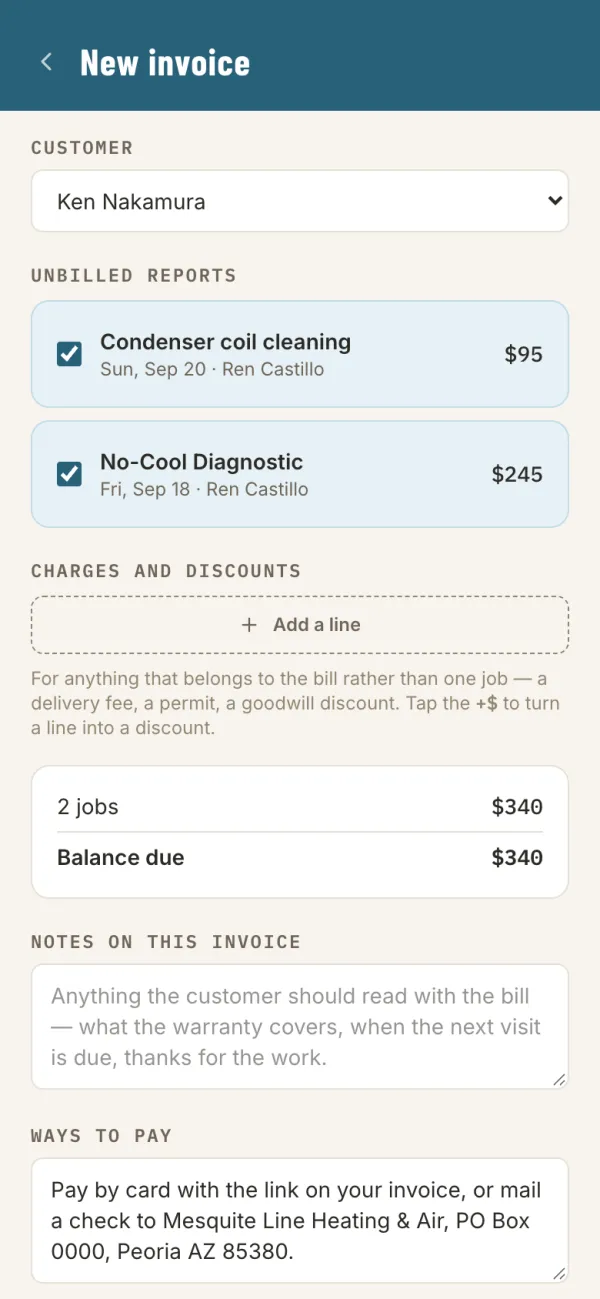
aTick the reports to bill: two jobs, one invoice.
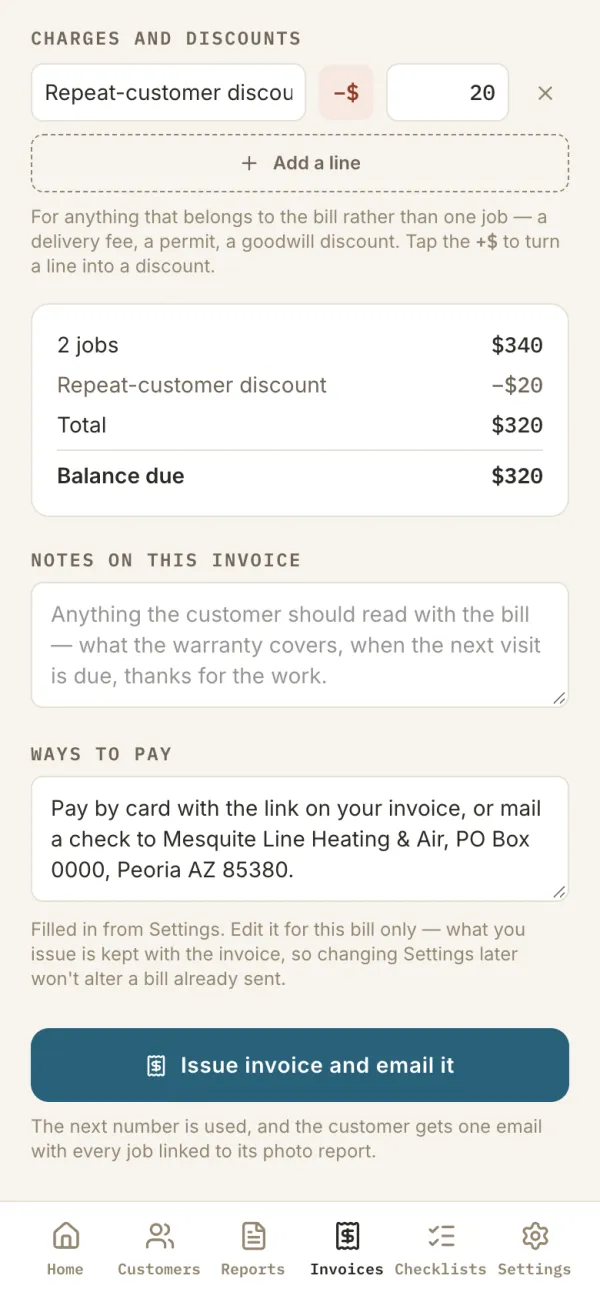
b+$ turns a line into a discount.
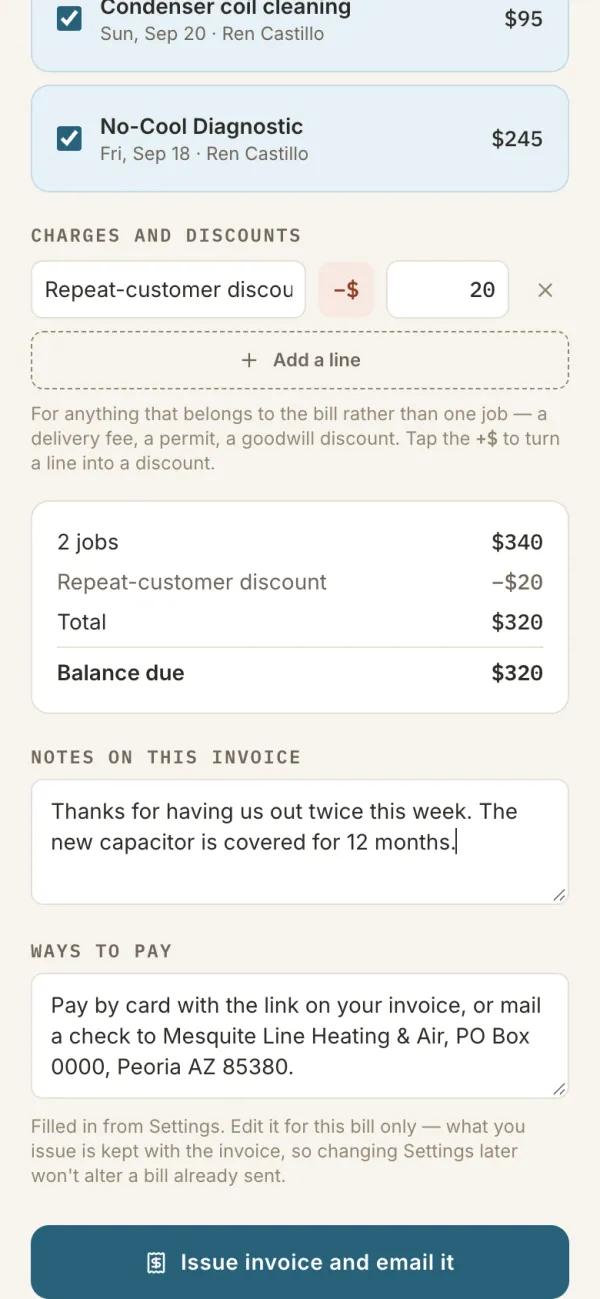
cNotes, ways to pay, then Issue invoice and email it.
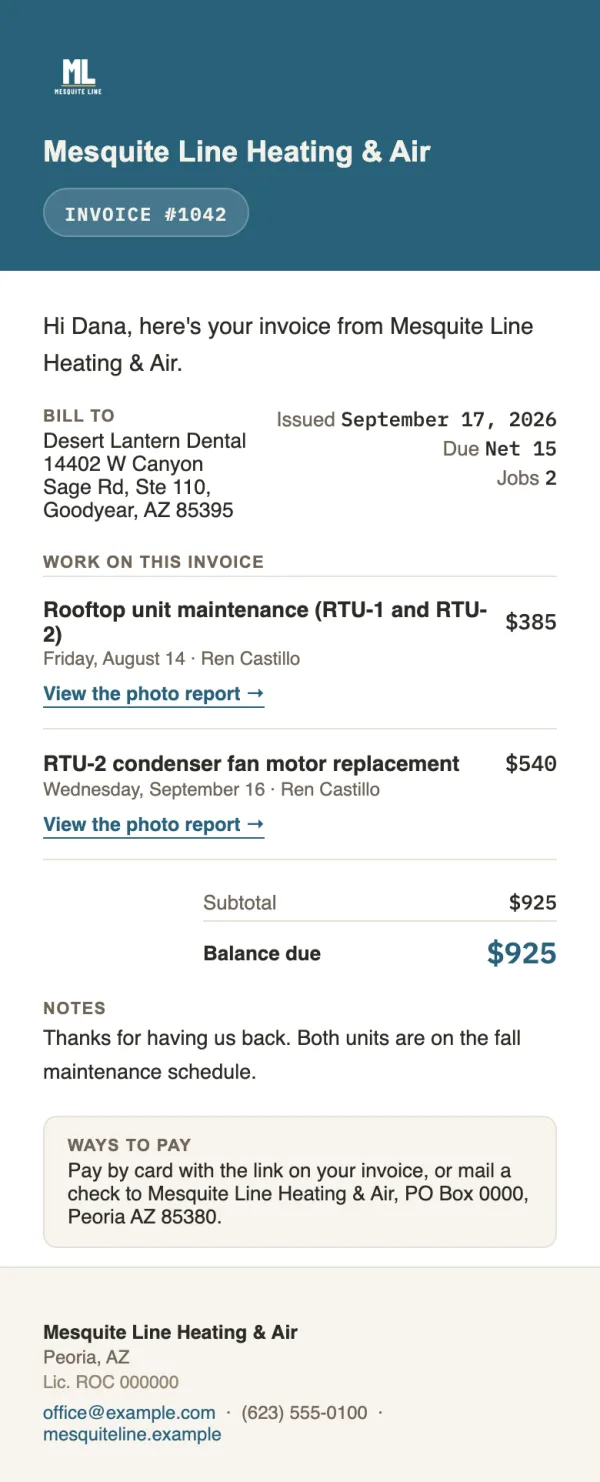
dWhat your customer gets: every job, linked to its photo report.
Once a report is on an invoice, its price is locked, so the invoice and the report always agree. To correct a mistake, open the invoice and tap Void. Give a reason, which stays on the record, and the reports unlock so you can fix them and bill them again.
Resend an invoice
- Open Invoices and tap the invoice.
- Tap Resend invoice. It goes to every contact on the customer who's set to get emails, and the app tells you who it went to.
An invoice that hasn't been emailed yet shows Email invoice instead. If an invoice says the email didn't go out, no contact on that customer is set to get emails: fix that on the customer, then send it.
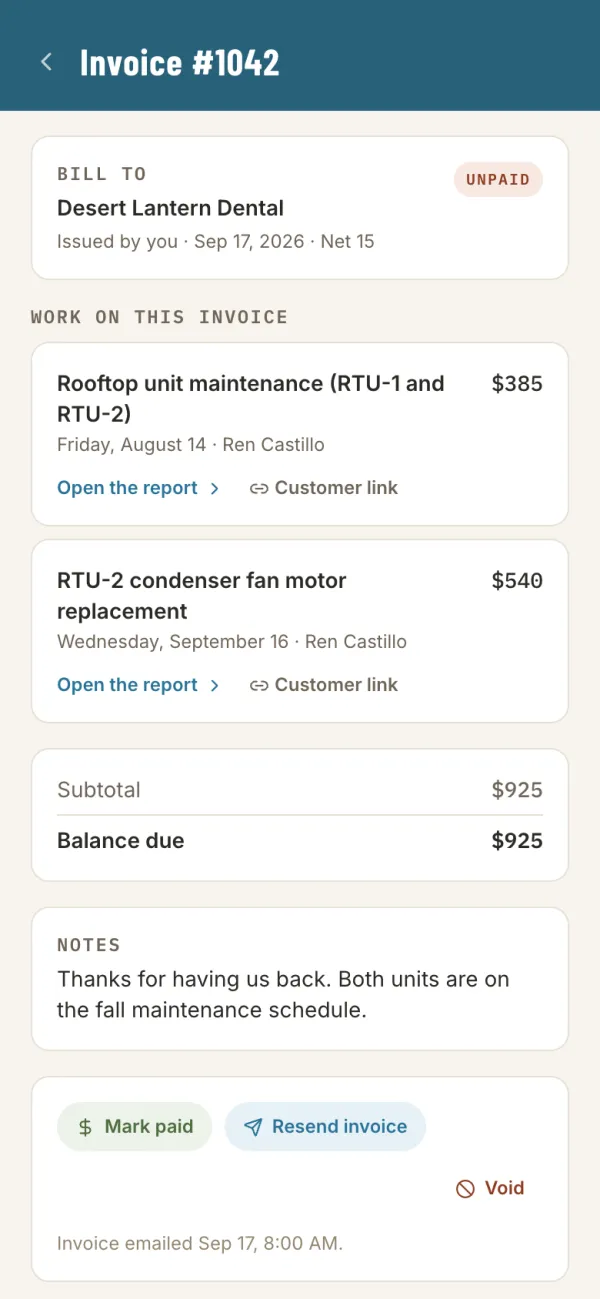
aResend invoice sits next to Mark paid.
Mark a job paid and send a receipt
Where you mark a job paid depends on how you bill:
- If you build invoices, open the invoice and tap Mark paid.
- If your report is your invoice, open the report and tap Mark paid in the Payment card.
Then tap Send receipt. It goes to the customer's contacts, and can ask for a Google review too.
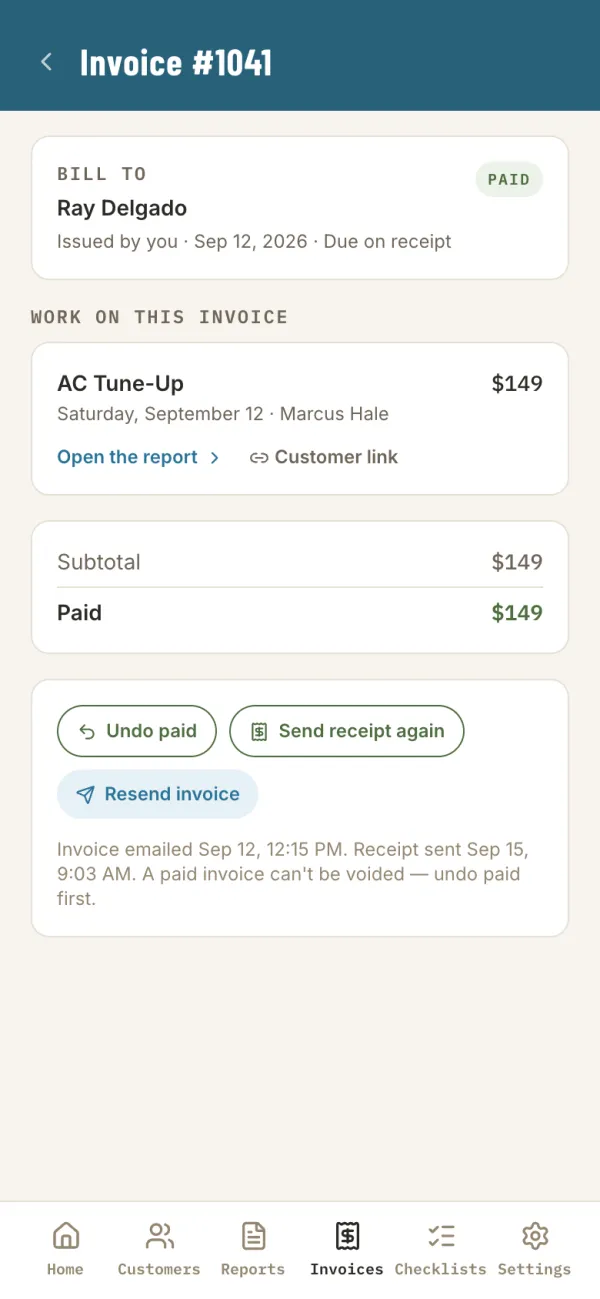
aA paid invoice, with the receipt sent.
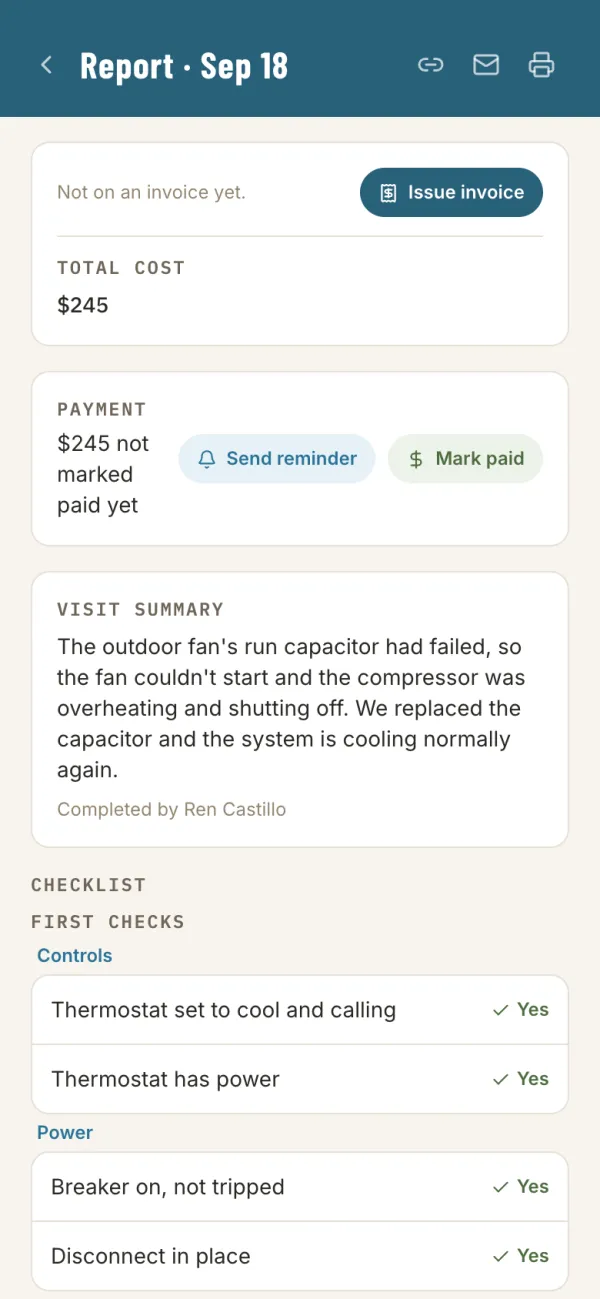
bOn a report: Mark paid, or Send reminder while it's still owed.
- Waiting on payment? On the report, Send reminder emails the customer a reminder. It changes to Remind again once you've sent one.
- Marked it paid by mistake? Tap Undo paid. A paid invoice can't be voided until you undo paid.
Common questions
Does the app work without cell signal?
Yes. Your answers save on the phone as you work, and photos upload by themselves once you're back in range with the app open.
Can I put the app on my home screen?
Yes. On an iPhone, open it in Safari, tap Share, then Add to Home Screen. On Android, open it in Chrome, tap the menu (⋮), then Add to home screen or Install app. It then opens full screen with one tap. On an iPhone, sign in once more the first time you open it from the home screen.
What's the difference between Skip and No?
A No goes on the report, with the note that explains it. Skip means the item doesn't apply to this job, and it's left off the report entirely.
Who gets the report email?
Every contact on the customer with Email this person when a report is submitted ticked. A customer can have more than one.
A customer says they never got the report.
Open the report and check the Completion email card. Bounced means the email address is wrong: fix it on the customer and tap Resend. If it says Delivered, ask them to check their spam folder, or send them a link to the report with the link button at the top.
Where does the AI summary come from?
The app drafts it from the answers on the checklist only, and skipped items are left out. It's a starting point: read it and edit it before you submit, because it goes to the customer word for word.
If I change a checklist, do old reports change?
No. Each report keeps the checklist it was done with. Changes apply to new visits.
Do my techs need their own logins?
Yes. Invite each one from Team in Settings. Every report shows who did the work.
How do I take away a tech's access?
Open Team in Settings and tap the trash icon next to their name. Reports they already did keep their name.
Can I put several jobs on one invoice?
Yes. On New invoice, tick every unbilled report you want on the bill. The customer gets one invoice, with each job linked to its photo report.
How do I fix a mistake on an invoice?
Open the invoice and tap Void, with a reason. The reports it covered unlock, so you can correct them and bill them again. A paid invoice has to be marked unpaid first, with Undo paid.
Can customers pay by card through the app?
Not inside the app. Put your card payment link, from Square, Stripe or whoever you use, in Payment instructions in Settings, and it appears on every report and invoice.
What is "Deposit or already paid"?
On the review screen, it's anything the customer paid before the job. The report and invoice then show the balance still owed.
Can I use it on a computer?
Yes. It runs in any web browser, so you can set things up and send invoices from a computer, and run jobs from your phone.
I got a new phone or a new number.
On a new phone, just sign in: your email, your password and the code texted to your number. If your number has changed, contact Lone Mountain Works and we'll help you set up the new one.