Sign in and set up two-step verification
We create your account and email you a link to choose a password. Open LMW Field App on your phone and sign in with your email and that password.
The first time you sign in, the app asks for your mobile number and texts you a six-digit code. That second step keeps your customers' addresses and gate codes safe, even if someone learns your password. From then on, signing in is your email, your password and a code by text.
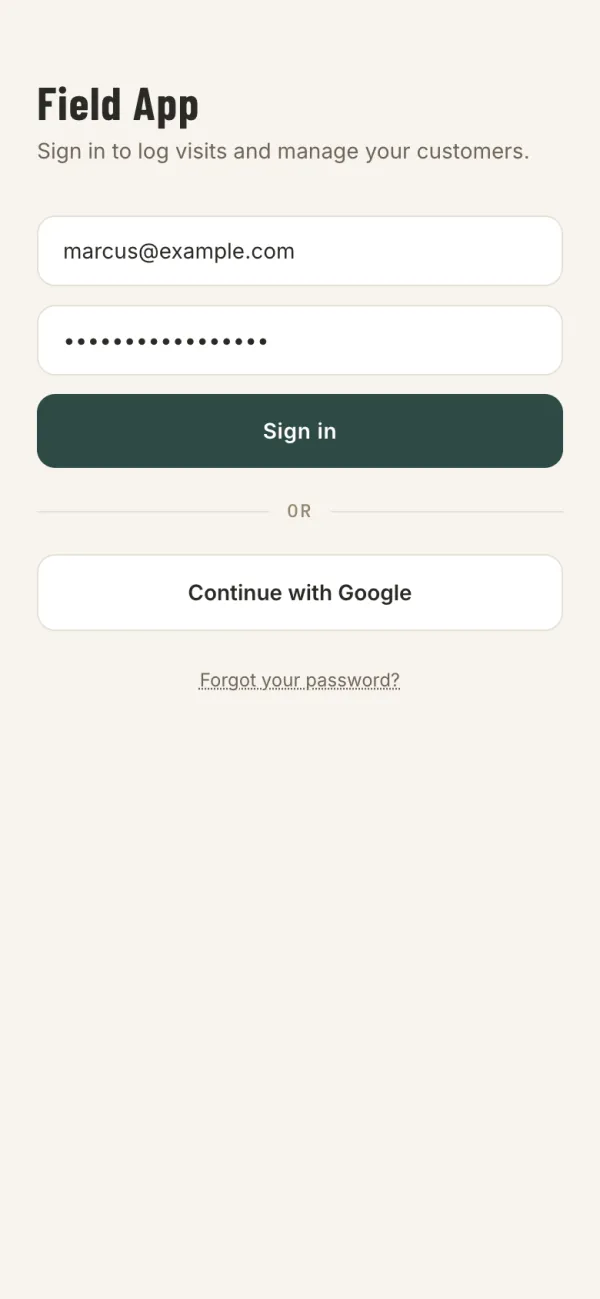
aSign in with your email and the password you chose.
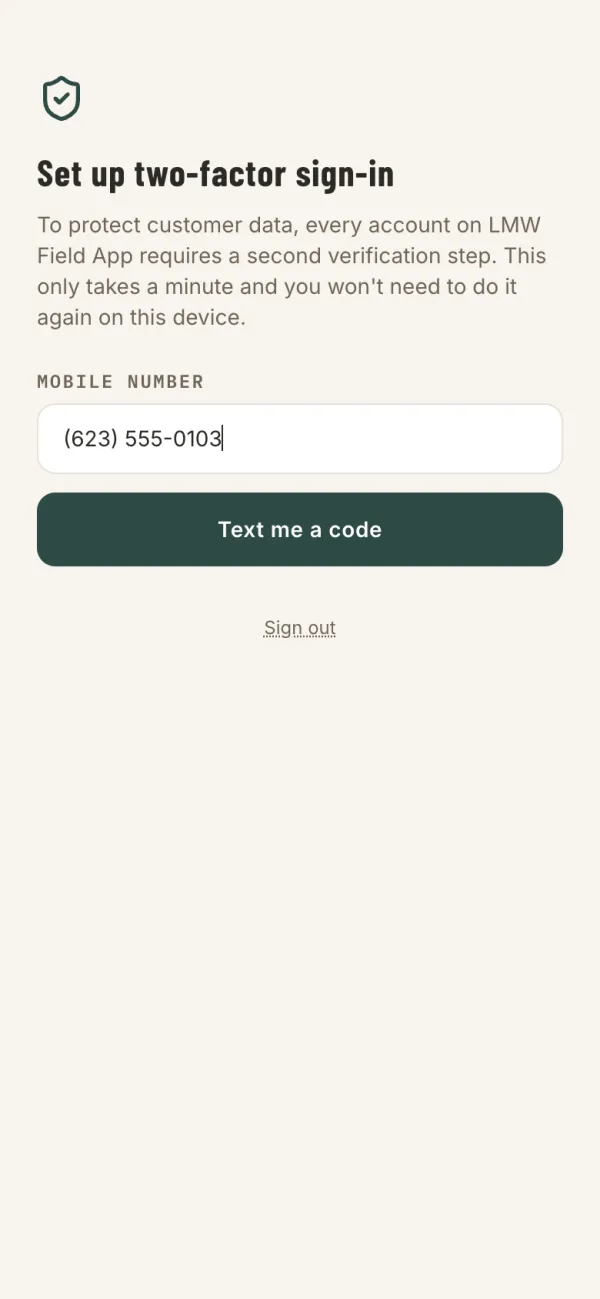
bThe first time only: enter your mobile number and tap Text me a code.
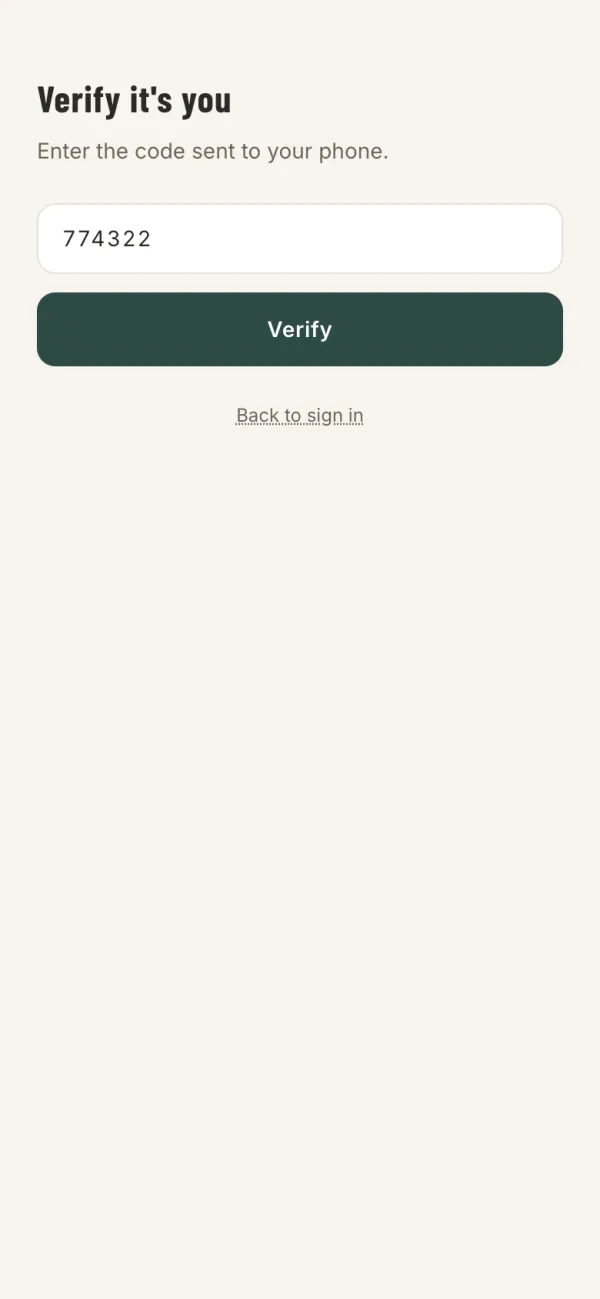
cType the code from the text and tap Verify.
Put the app on your home screen
Save LMW Field App to your phone's home screen and it opens with one tap, full screen, without the browser's address bar. It works on iPhone and Android.
iPhone
- Open app.lonemountainworks.com in Safari.
- Tap Share , the square with an arrow pointing up. On newer iPhones it's inside the ⋯ button at the bottom.
- Scroll down and tap Add to Home Screen, then Add.
Android
- Open app.lonemountainworks.com in Chrome.
- Tap the menu at the top right.
- Tap Add to home screen (on some phones, Install app), then Install.
 Look for Field App on your home screen.
Add your logo, colors and review link
Open Settings. What you put here is what your customers see. Your logo and brand color sit at the top of every report. Business email is where customer replies go, and Notify me at is where the app tells you about anything that needs you, like a report email that bounced.
Further down, add your phone, website and license number for the bottom of each report. Then paste in your Google review link, and every report ends with a button asking the customer for a review.
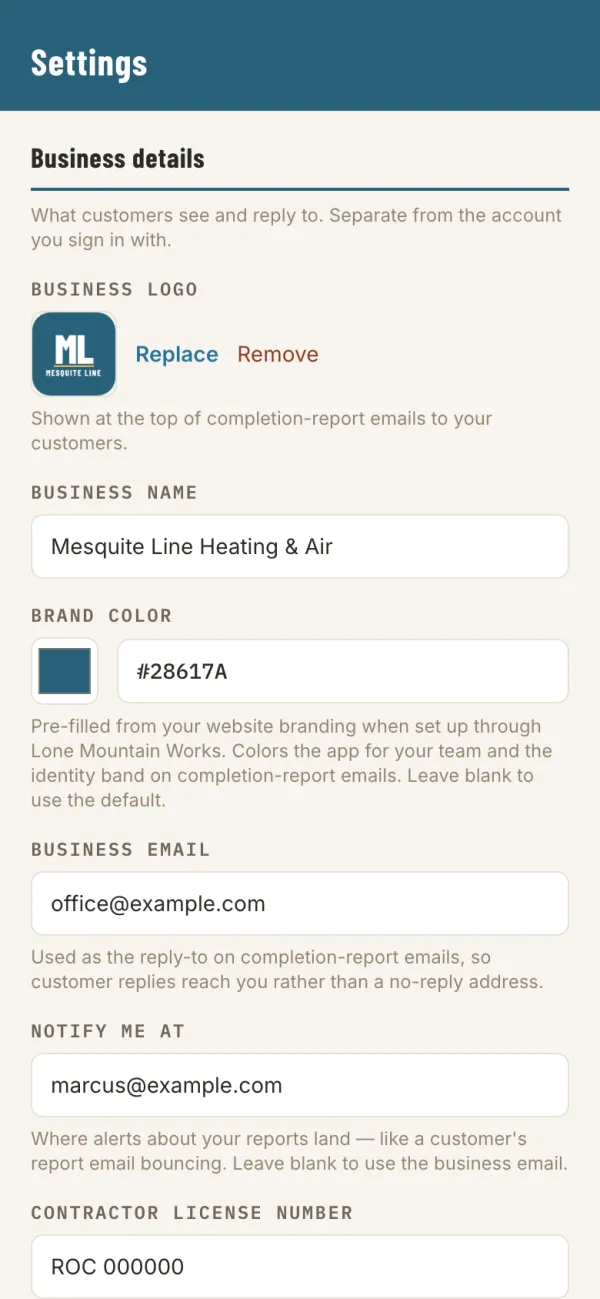
aBusiness details: tap Replace to upload your logo, then set your brand color.
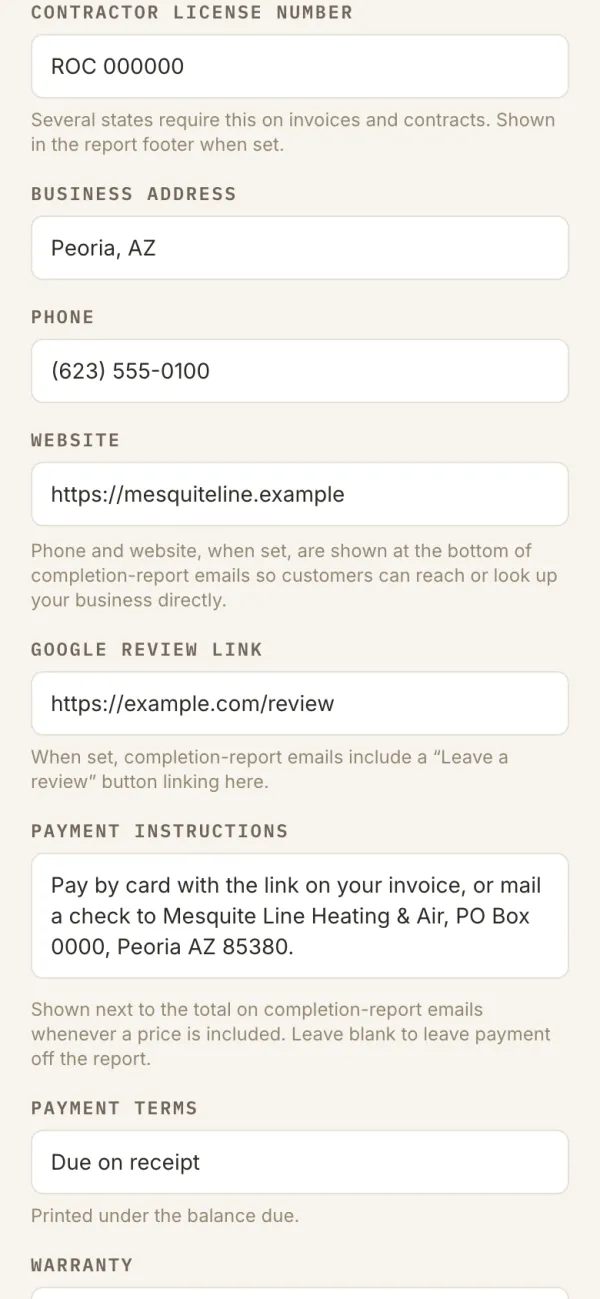
bGoogle review link: paste it here and every report asks for a review.
Set your payment instructions and terms
Still in Settings. Payment instructions tell customers how to pay you, whether that's a card link, Zelle or a check, and they appear next to the total on every report. Payment terms, like Due on receipt or Net 15, print under the balance due. Your Warranty goes at the bottom of every report.
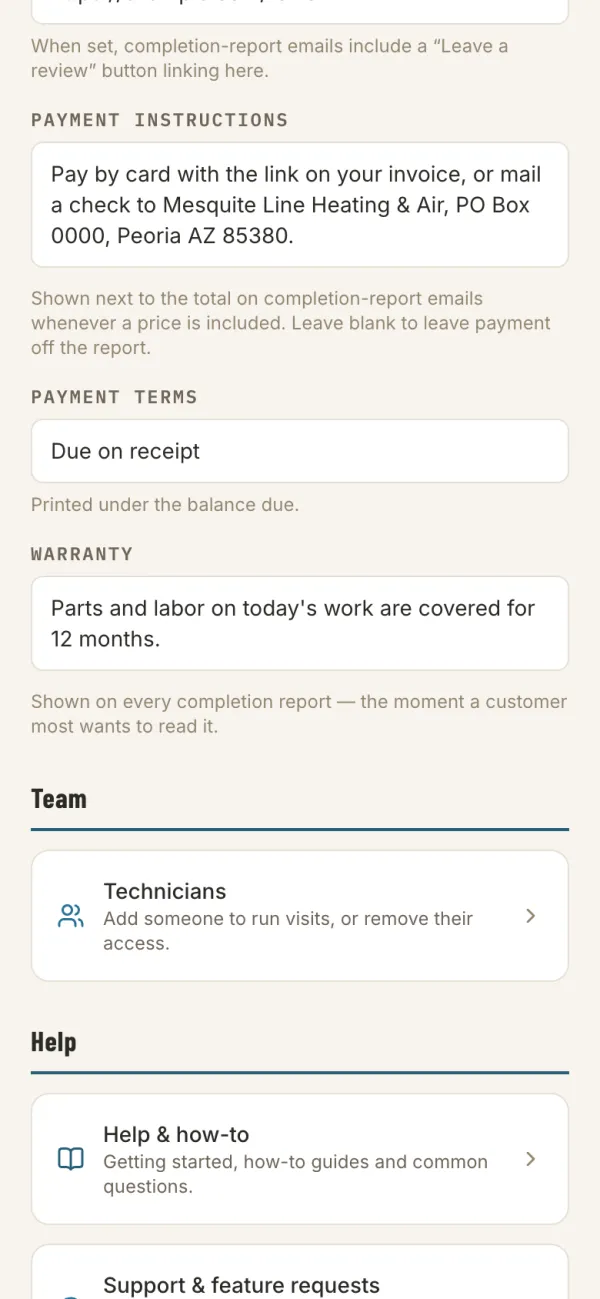
aPayment instructions, terms and warranty each go on every report.
Set up your checklists
We start you with checklists for your trade. Each one is a kind of visit your crew does, like an AC Tune-Up or a No-Cool Diagnostic. Open one to change it: rename an item, move it to another group, or change how the tech answers it, whether that's Yes or No, a reading with a target range, a photo or a note.
Changes save as you go. New visits use the checklist as it is now, and reports you've already sent keep the version they were done with. You can also describe your trade and have the app draft new checklists for you to review.
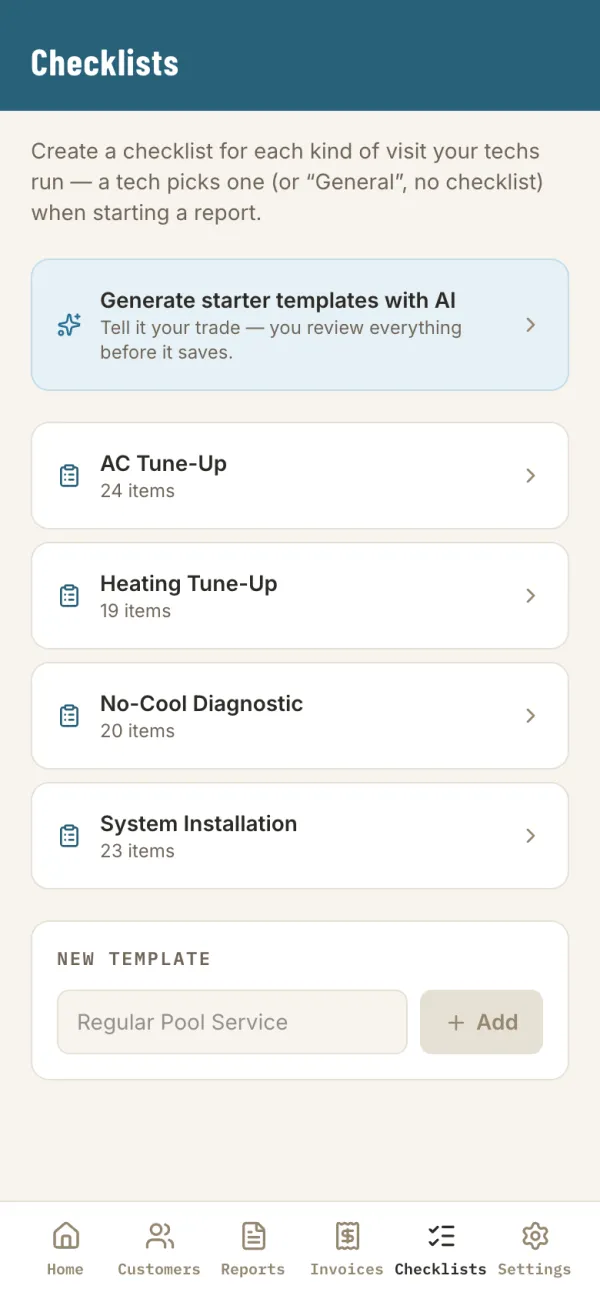
aChecklists: one for each kind of visit. Tap one to open it.
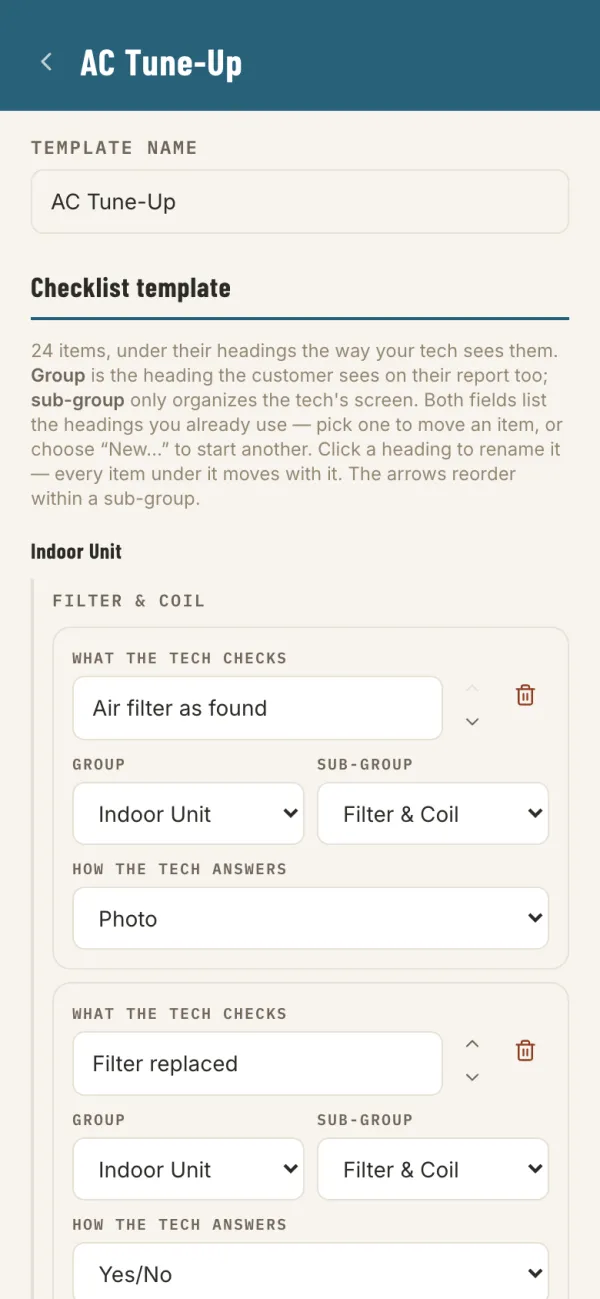
bEdit any item. The group is the heading your customer sees on their report.
Invite your techs
Open Team, under Settings. Type your tech's name and email and tap Send invite. They get an email to choose a password, then set up a code on their phone, the same two steps you did.
Techs can run visits, add and update customers and send reports. They can't change your settings or checklists, or manage the team. Every report shows who did the work. To take someone's access away, tap the trash icon next to their name.
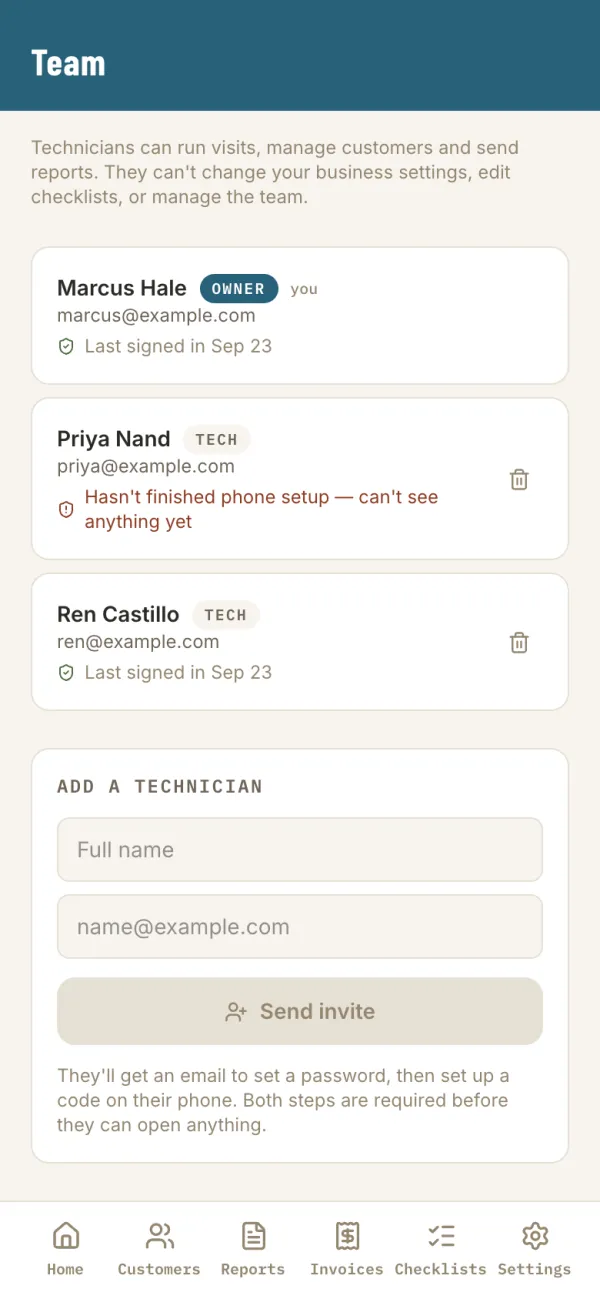
aTeam: everyone who can sign in, and whether they've finished setting up their phone.
Run your first job
Open the customer, pick the checklist for the job and work down the list. Nothing reaches the customer until you submit it, so you can back out and change anything along the way.
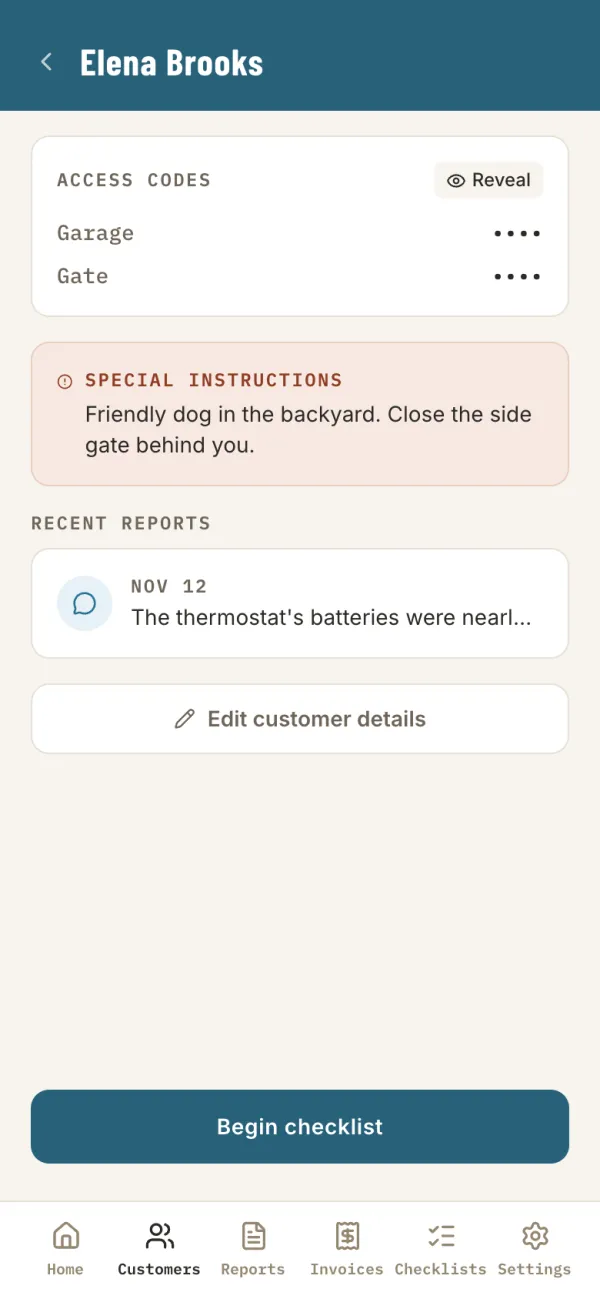
aOpen the customer. Gate and garage codes and any special instructions are at the top. Tap Begin checklist.
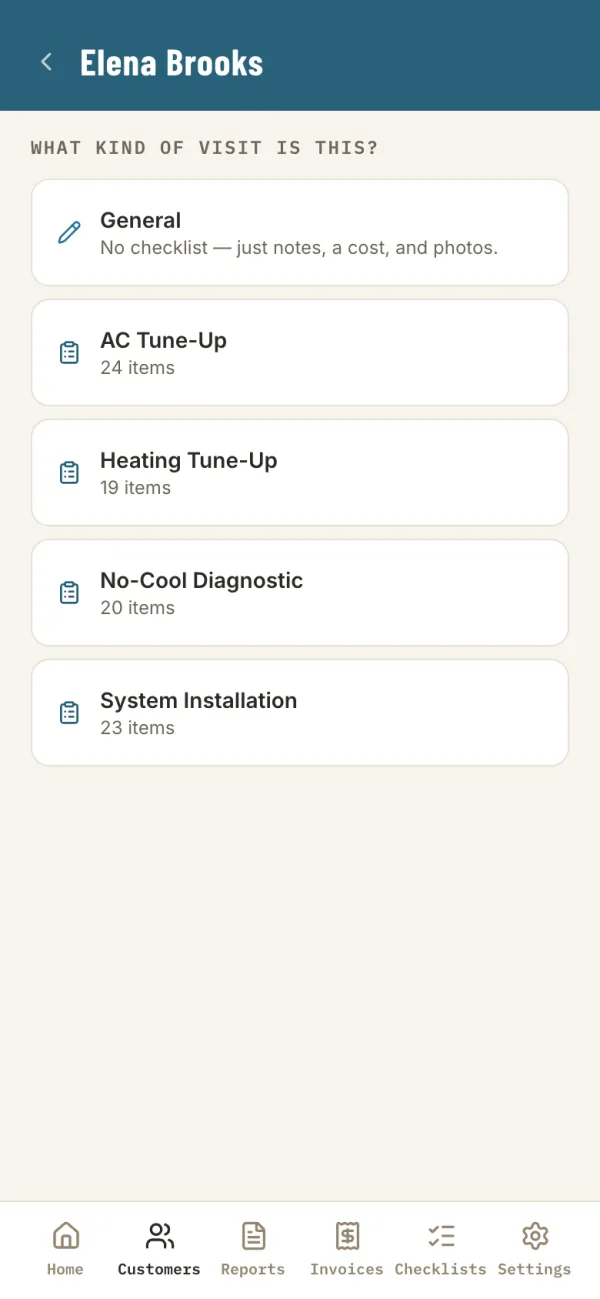
bPick the checklist for the job, or General for a quick visit with no checklist.
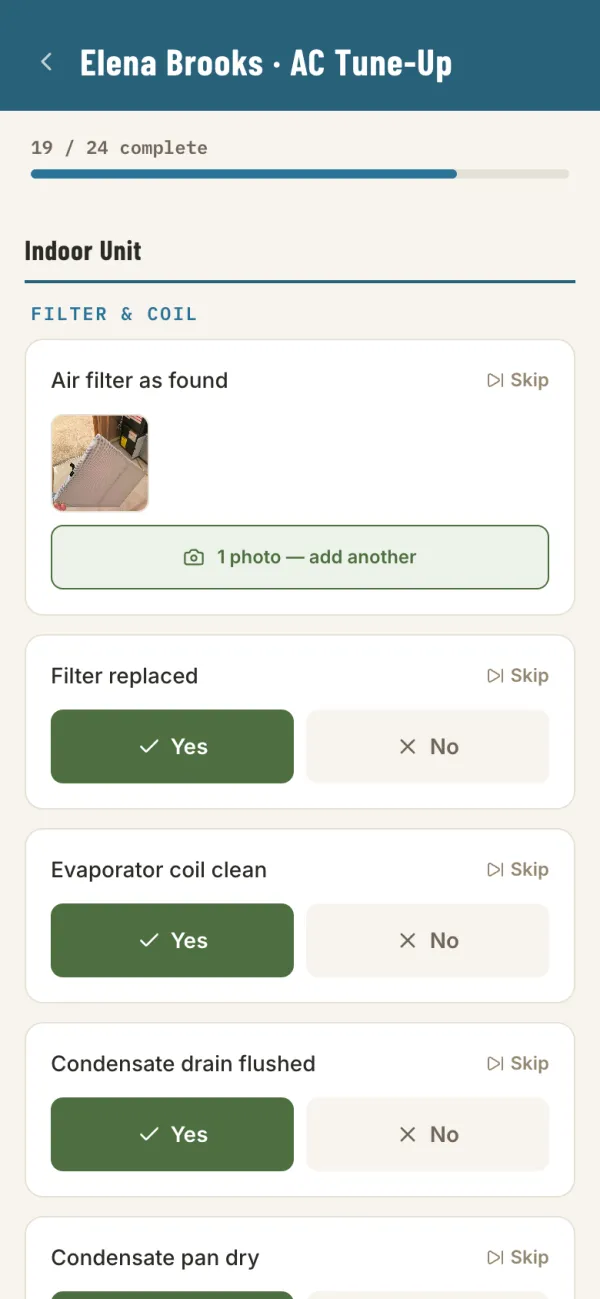
cWork down the list. Tap Yes or No, and add photos right on the item.
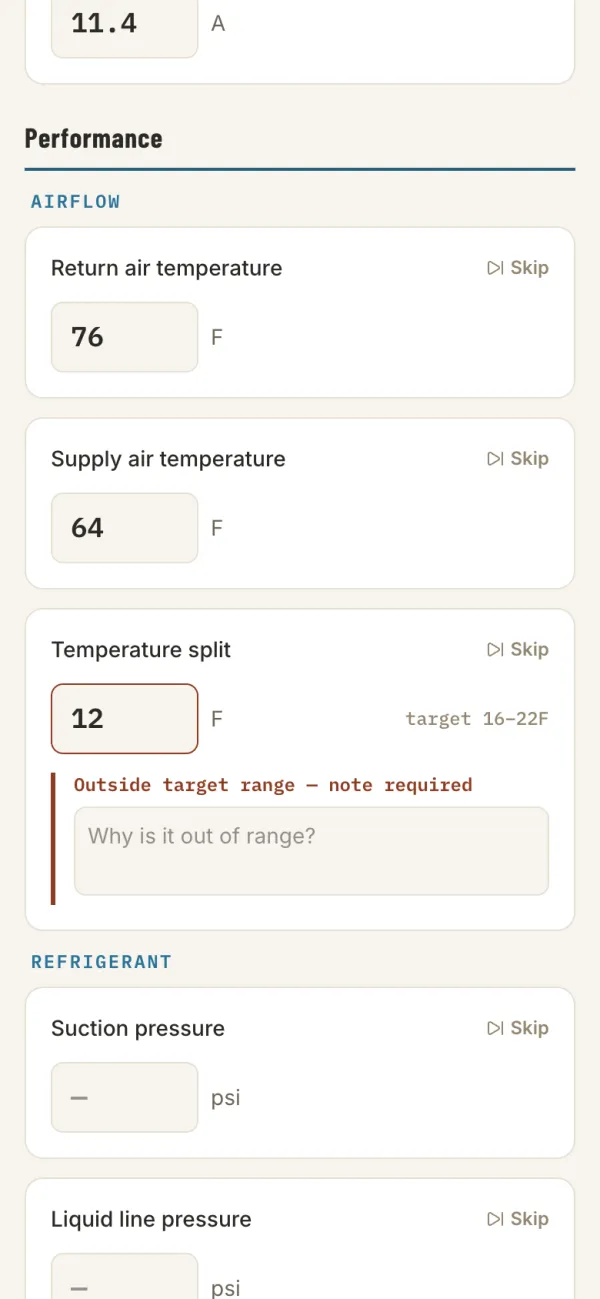
dReadings flag themselves. Outside the target range, a reading turns red and asks why.
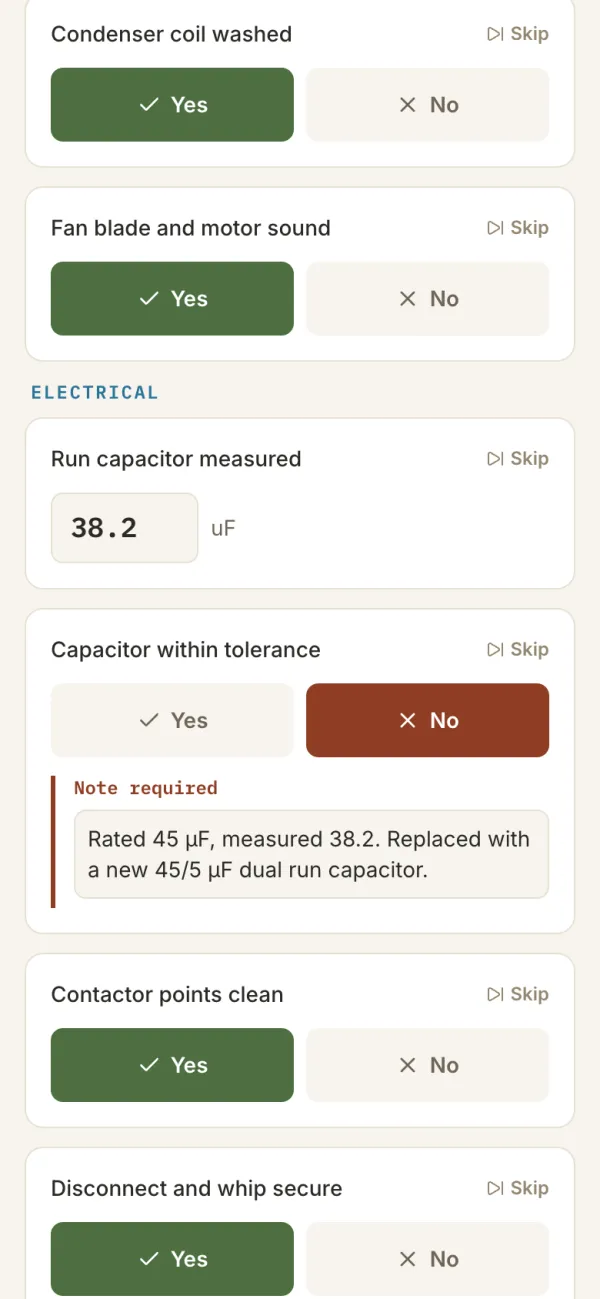
eA No asks for a note, so the customer knows what you found and what you did.
Doing two things at one house? At the bottom of the checklist, tap Add another service. When you're finished, tap Done — review.
Review, submit, and what your customer gets
The review screen is your last look before the customer sees anything. Set the price as one total, or itemize it per service. Add a short line for Service(s) performed. For the summary, tap Draft for me and the app writes it from your checklist. Read it over and edit it, because it goes to the customer word for word. Add any extra photos, then tap Submit report.
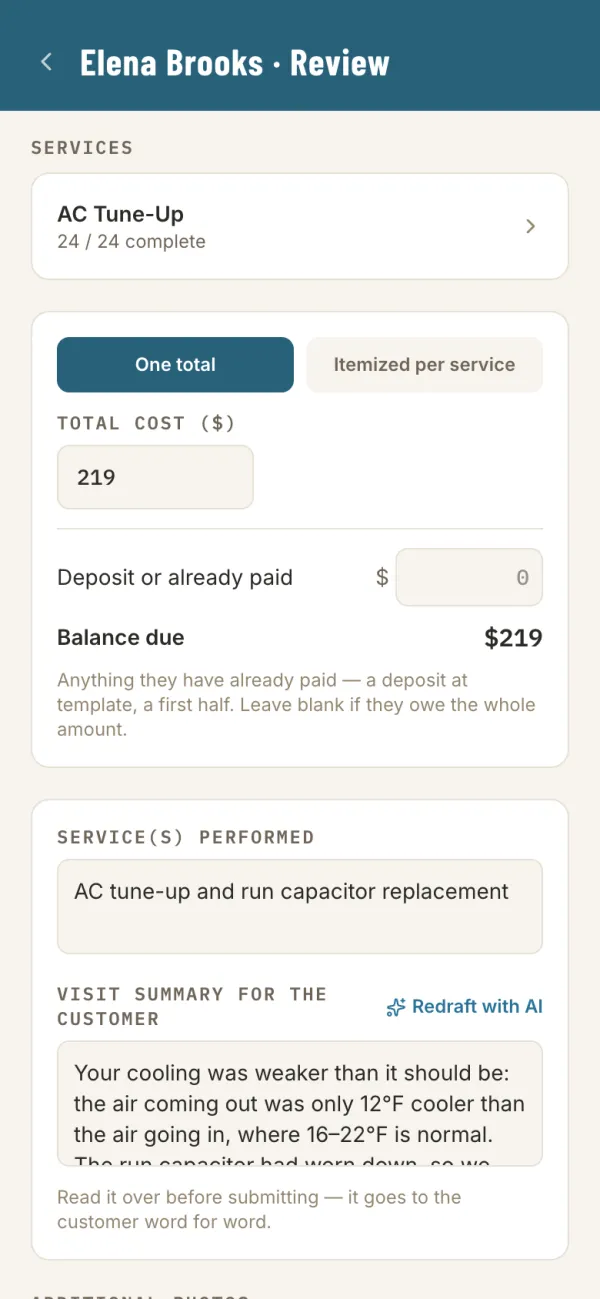
aPrice and summary: one total or per service, and a summary the app can draft for you.
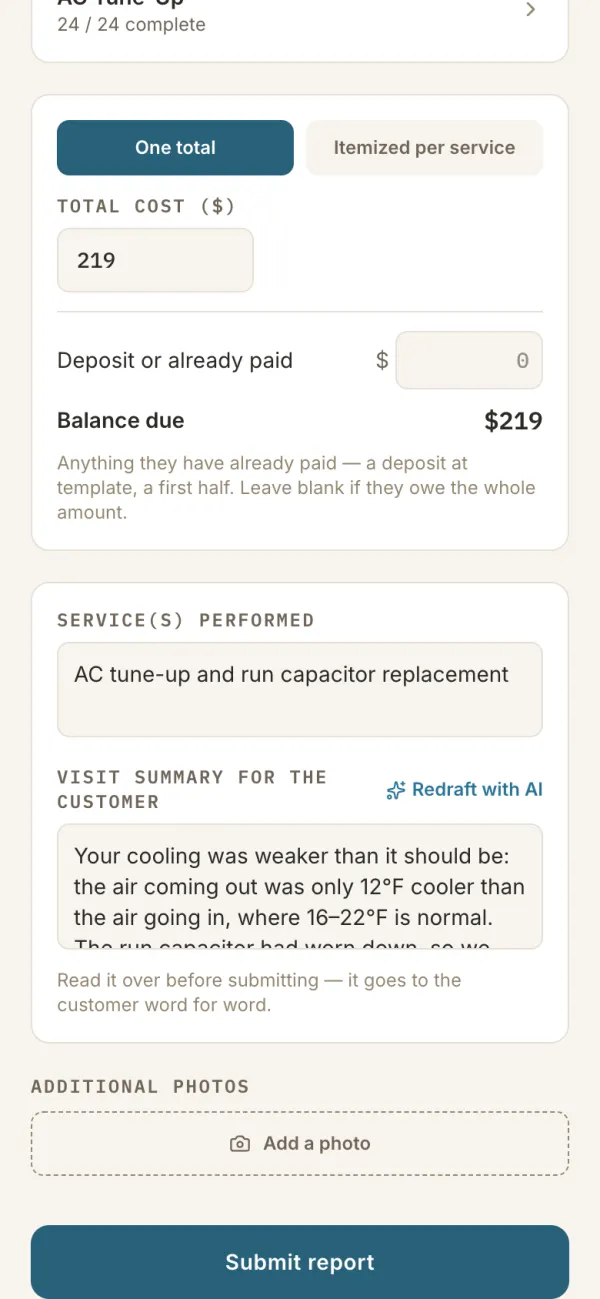
bRead it over, then tap Submit report.

cWhat your customer gets: the report, in their inbox a moment after you submit. Scroll it.
The report goes to every contact on the customer who's set to receive report emails. It ends with your warranty, a review request signed by whoever did the job, and your contact details.
Invoices and getting paid
How billing works depends on how your account is set up. If your report is your invoice, the total on the report is the bill and there's nothing more to do. If you build invoices, as Mesquite Line does, use the Invoices tab.
Tap New invoice, choose the customer and tick the reports to bill. Several jobs can go on one invoice. Add any charges or discounts, a note and how to pay, then tap Issue invoice and email it. When the customer pays, open the invoice, tap Mark paid and send them a receipt.
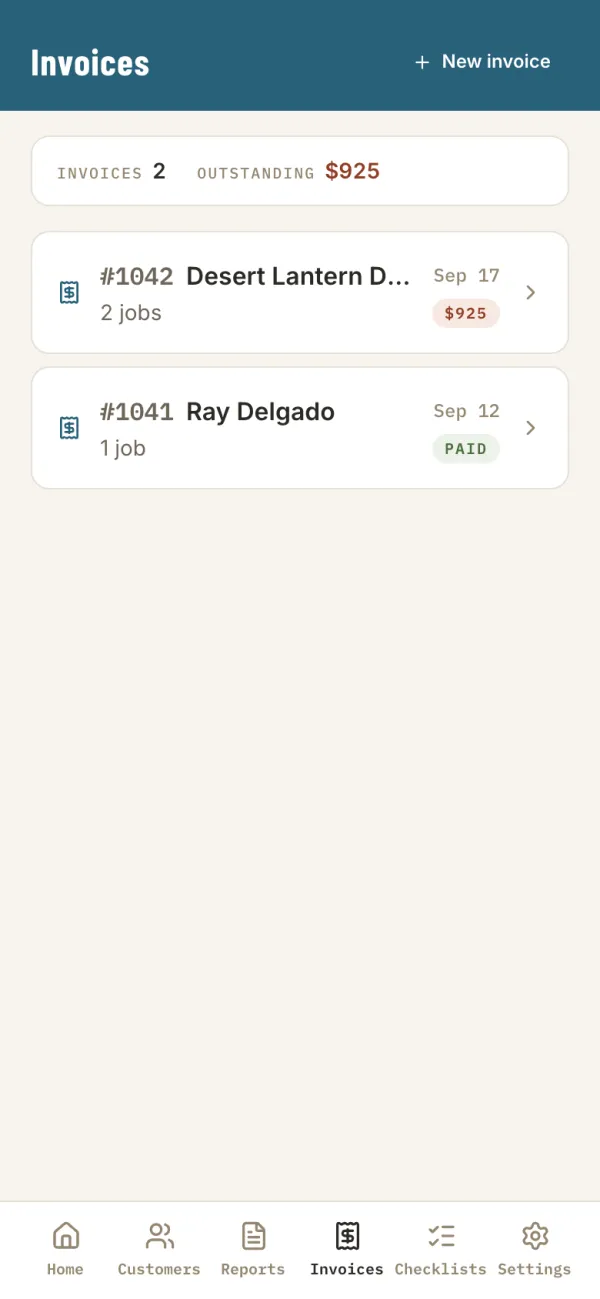
aInvoices: what's outstanding, at a glance.
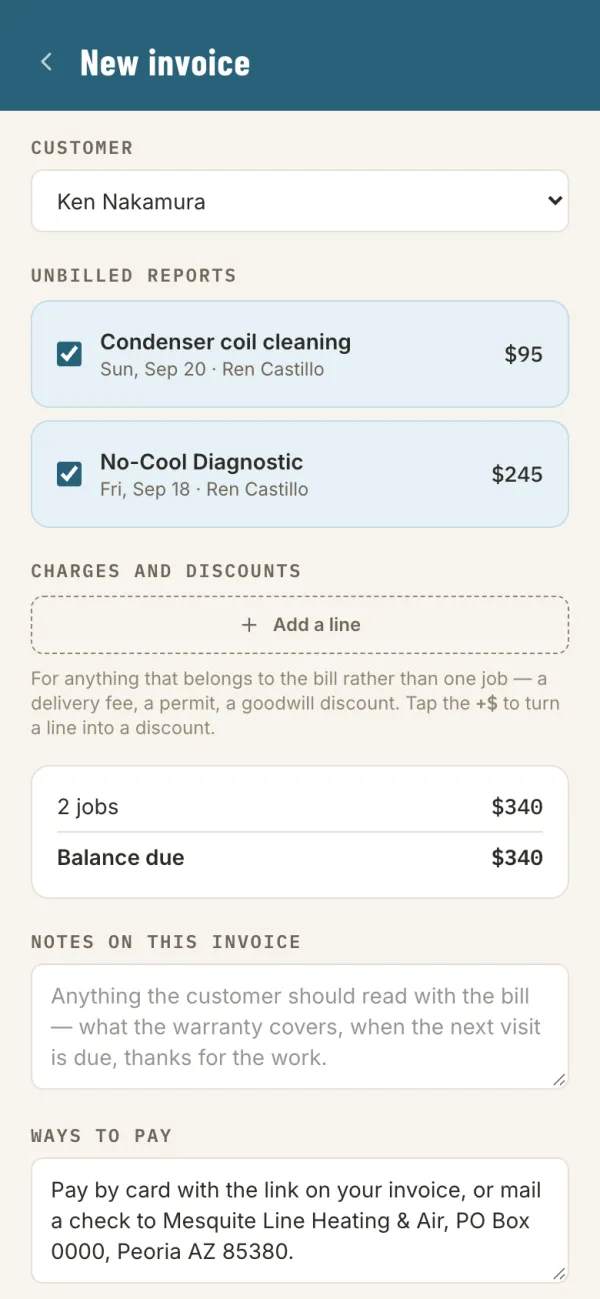
bNew invoice: choose the customer and tick the reports to bill.
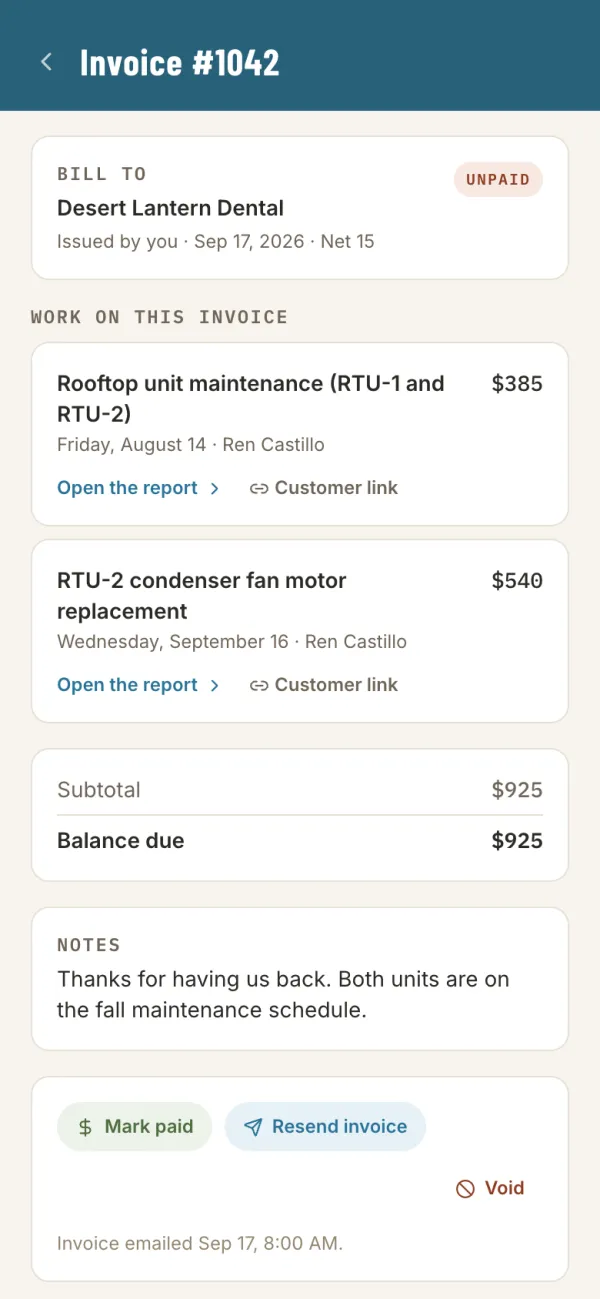
cAn open invoice: tap Mark paid when the money comes in.
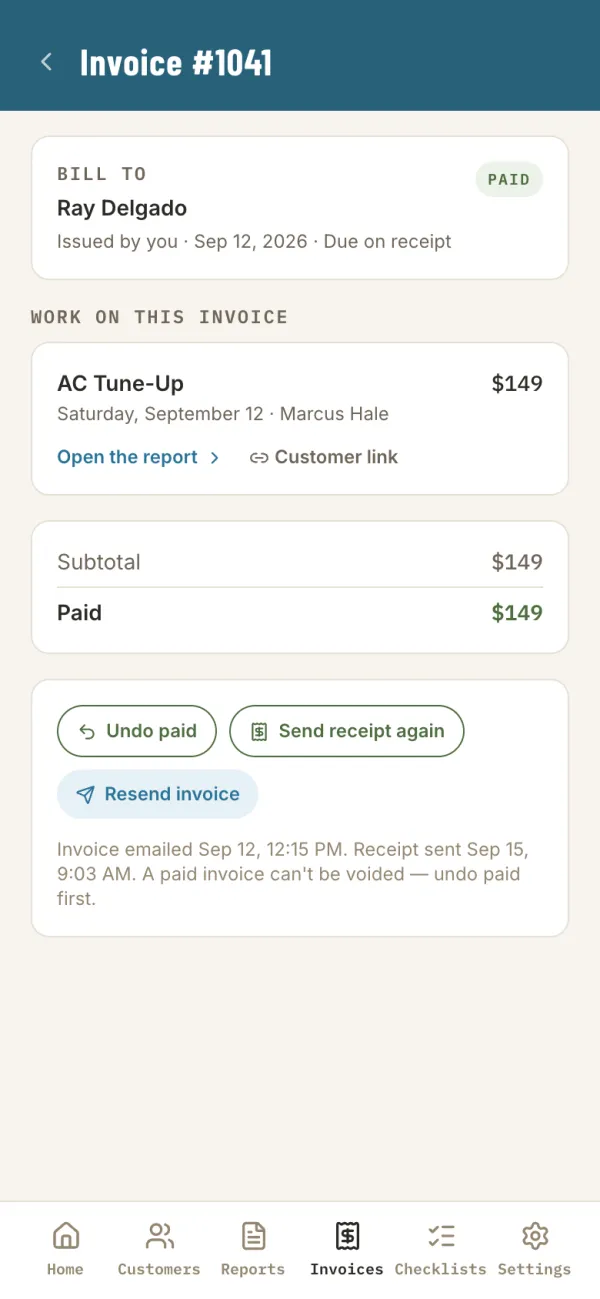
dPaid, with the receipt sent.
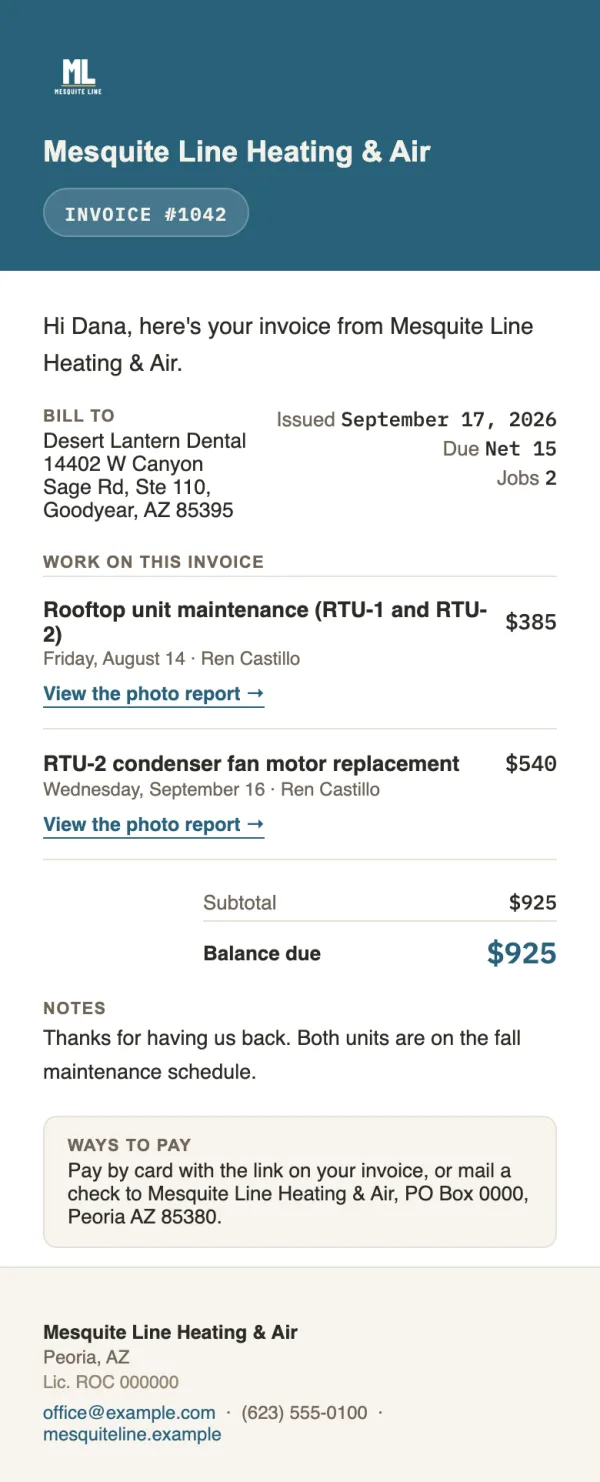
eWhat your customer gets: the invoice, with each job linked to its photo report. Scroll it.
Charges, discounts, several jobs on one bill, and fixing a mistake: Create and send an invoice.